We Are Moving!

In case you haven’t noticed, we are making some big changes around here! We are re-branding from both The Partyist and Party in Pink into ONE brand, Celebration Stylist. I’ve been wanting to do this for a while now and finally found a name I love. I’ve branched out far from just little girly parties and I needed a new name to reflect that! And I wasn’t in love with “the partyist” so here we are! We are merging our 2 websites into one and moving from WordPress to Blogger so bare with us as we piece together this puzzle! Things will run seamlessly very soon!! Thanks as always! Our new URL will be TheCelebrationStylist.com Please subscribe there if you would love to continue receiving our updates!

FullSizeRender

Pineapple in Paradise

I’m so excited to post this styled shoot I did for Oriental Trading. I love Oriental Trading and have been using their products for years now. Their prices and selection honestly can’t be beat. So I wanted to put together a post to show how I used only $75 worth of party supplies to put together this fun party!
final_edited-1

These paper fans come in a lot of different colors and each pack comes with more than enough fans in various sizes. All I did was tape them with packing tape to a large foam board. This would make a great backdrop for any tropical party and would be fun to take photos on. The pineapple is a real pineapple that I spray painted gold.

IMG_4568

THE BEST Pina Colada Recipe (no, seriously though!)
2 oz. Coconut Cream

2 oz. Pineapple Squash or Concentrate

1 oz Milk

2 oz. dark Rum

1 cup Ice

Blend until smooth

Makes 1 serving


Here’s the story behind my Pina Colada recipe. A few years ago, my hubby and I were lucky enough to stay on a private island in Belize. It was stunning to say the least. When you arrived on the boat, you were greeted by staff members with Pina Coladas. They were amazing and we had more of them on that trip than I should admit. They were so good that after we left, I emailed the staff for their recipe because they were THAT good and much to my surprise, they actually sent it to me!
IMG_5185

Shop the look here

“This review is based strictly on my opinion. I was provided the sample free of charge by the company to provide my honest review. No other type of compensation was received. All ideas and opinions are my own.”


Lilah’s Magical Boho Party 


Boho Baby Shower 


Paris Party

Here is the Paris Party I did this weekend 💕😊   


Beauty and the Beast Party

IMG_9836IMG_9835IMG_9837IMG_9838IMG_9793

This was a Beauty and the Beast Party for a 4 year old and the goal for us was to make it feel as much like the ballroom from the movie as possible. We wanted the guests to feel like they were actually in the movie. The backdrop was a key component to this. I designed it myself and had it printed on vinyl. The kid’s sized gold chiviari chairs were also a key component in tying everything together as they have such an elegant feel. For the cake table, she wanted to keep it simple so her elaborate cake would stand out, and it did! I used a lace table cloth under a gold satin one and pinned it up to mimic Belle’s dress. We used books (because Belle loves to read) to add height and included lots of roses because the rose is one of the big themes in the movie. For one of the books, I designed a personalized book cover with the Birthday girl’s name on it and modgepodged it to one of the faux books for a special touch. We had the enchanted rose on it’s own table similar to the movie.
Chiviari chairs and pipe and drape rental: Imperial Party Rentals
Gold Chargers: Michaels
Enchanted Rose: https://www.etsy.com/listing/247843172/beauty-and-the-beast-enchanted-rose-life
Linens: CV linens
Candelabras: https://www.etsy.com/listing/199052766/gold-wedding-candle-candelabras-3-arm?ref=listing-shop-header-0
Giant Rose: Hobby Lobby
Faux Books: Home Goods
Belle character/Design and Styling: Party in Pink Events

Ticky Tacky

What would the holidays be without a Tacky Holiday Sweater Party? It’s a must do! This year I decided to mix it up a little and add one of my other favorite Christmas traditions, cookies!! And I do love a good party activity.

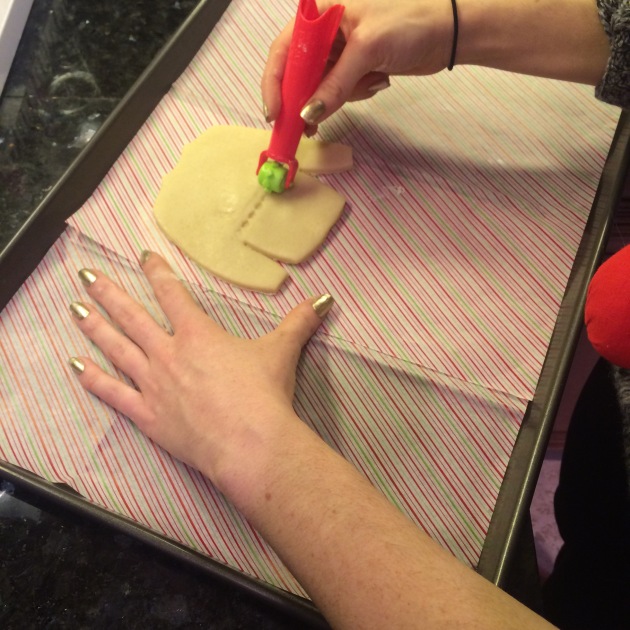
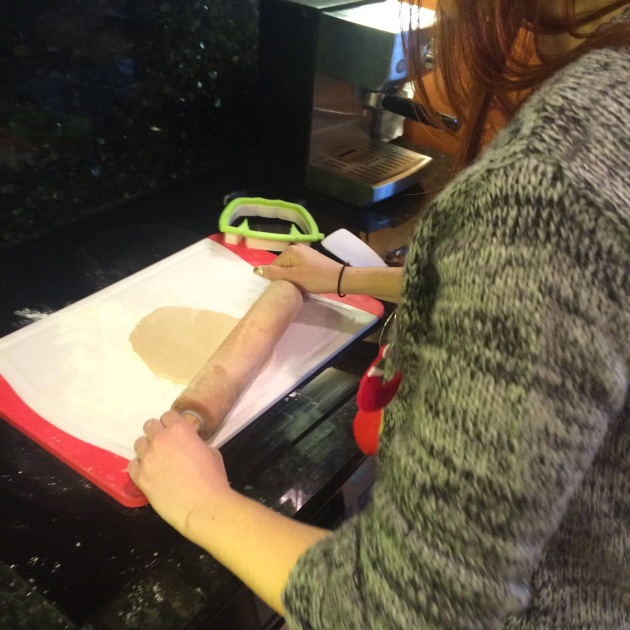
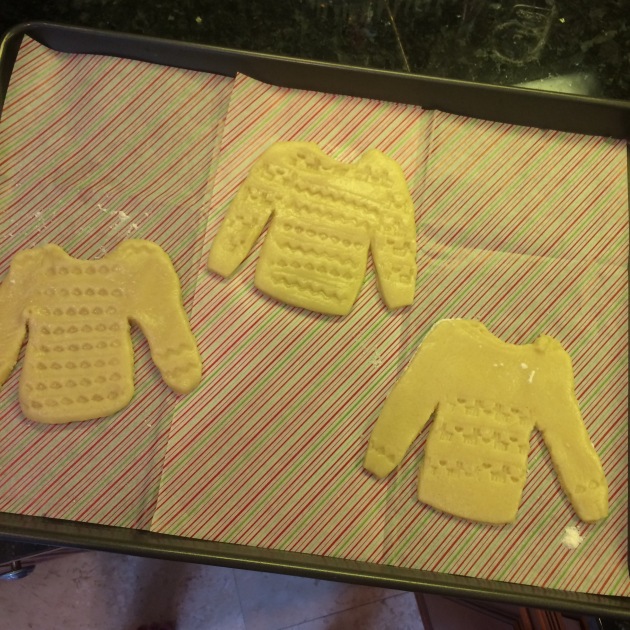
So I had everyone come over in holiday sweaters (in 80 degree FL weather…oops) and we all baked cookies together using a tacky sweater cookie cutter and stamper from Sweet Creations.                 

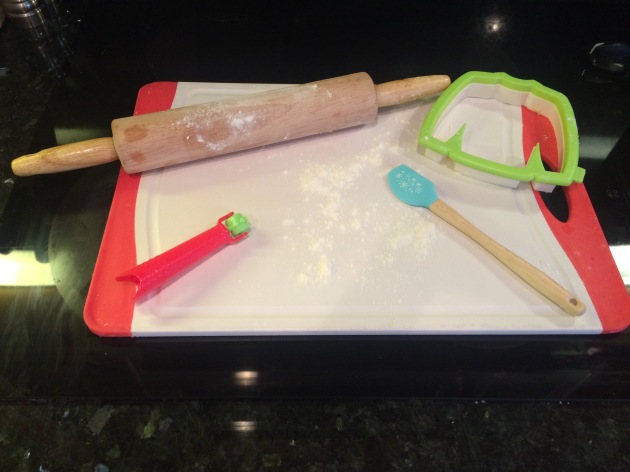
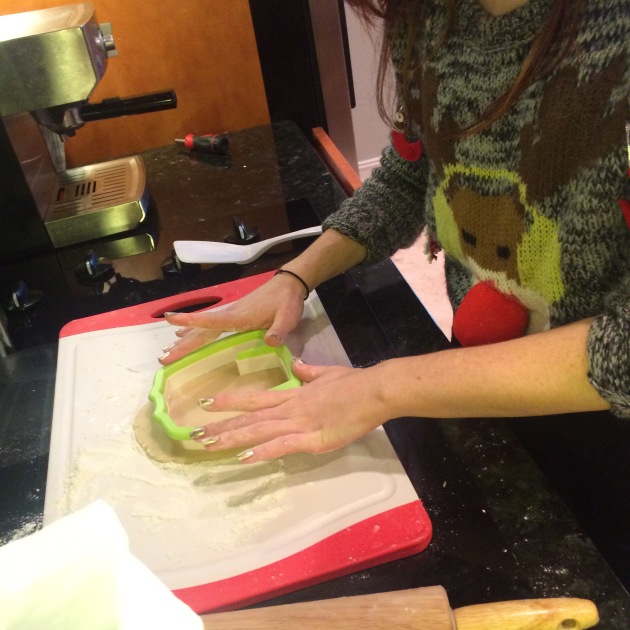
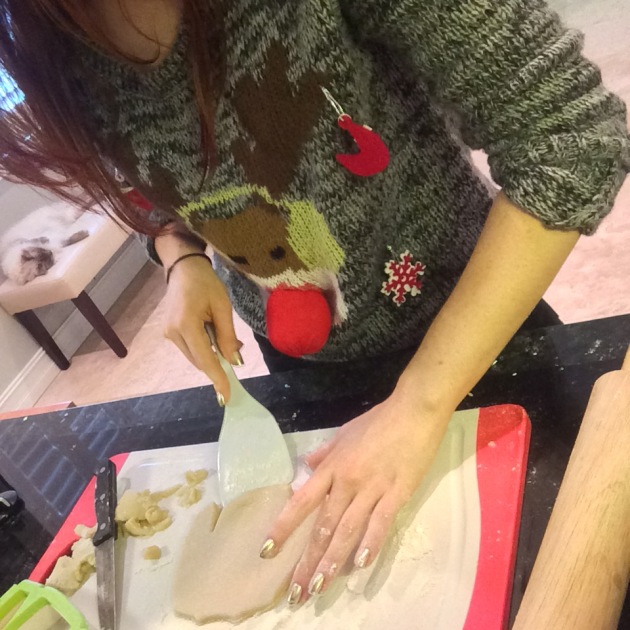
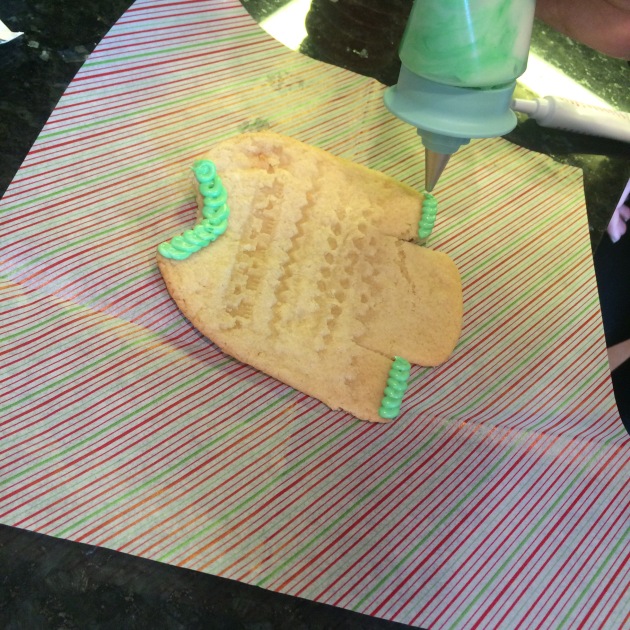
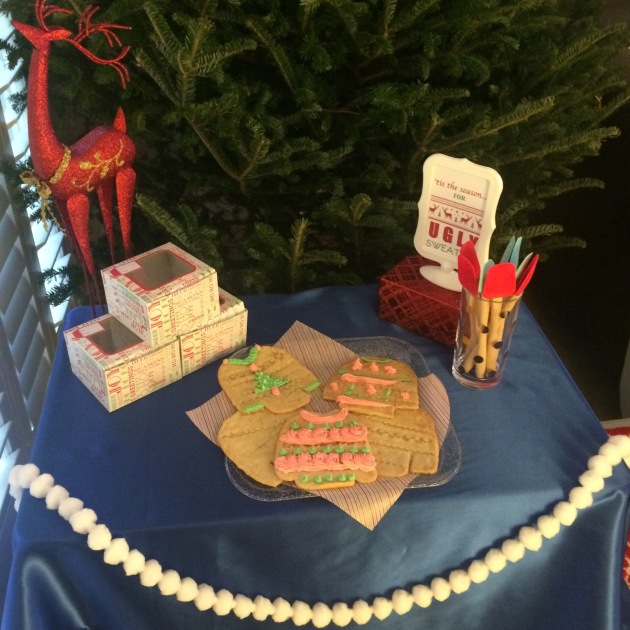
Learn from my mistake and make your own cookie dough. I tried to take a shortcut and use store bought, and while they tasted good, the dough spread too much and got mushy very quickly which made it hard to work with. But for all you fellow shortcut takers out there, the store bought icing on the other hand works just fine.

For those interested, here’s the recipe I should have used (#regrets)

 3 cups of all purpose flour

 1 cup of granulated sugar

1 1⁄4 teaspoon baking powder

 1⁄4 teaspoon salt

 2 sticks unsalted butter, at room temp

 1⁄2 teaspoon vanilla extract

 1⁄2 teaspoon lemon extract

 1 large egg

 2 ounces cream cheese
1. Place flour, baking powder, and salt in a medium bowl and whisk to combine. Set aside.
2. Place sugar and butter in a large bowl and beat with an electric mixer until creamy and smooth. Add extracts, egg and cream cheese, beating to incorporate.
3. Gradually add flour mixture and stir to combine. Divide dough in half and wrap tightly in plastic wrap. Refrigerate for at least 1 hr.
4. Preheat oven to 350 degrees F. Line cookie sheet with parchment paper and set aside.
5. Roll dough out to 1⁄4 inch thick on a powdered sugar-dusted work surface. Cut cookies into shapes. Place an inch apart on prepared baking sheets. Bake until edges are golden- about 12 minutes.
6. Remove from heat and let cool on baking sheet for 1-2 minutes before transferring to wire rack. After cooling, cookies can be decorated with icing.

Thank you to Tryazon and Sweet Creations for sending me these products for review. These opinions are my own. Buy these adorable cookie cutters and stampers here.

Have you ever been to a tacky sweater party?

sig

Knee Socks

There’s no secret knee socks are making a comeback. They’re in everyone’s instagram posts lately, perfect for the season. They’re great for lounging, to wear with boots, and even make the perfect stocking stuffer!   
Chrissy’s Socks sent me these knee socks for review and I just loved all the patterns they had to offer. I had a hard time picking my faves! I already regret not getting the donut socks. And they’re the perfect height and stay up all day long. 


Probably the coolest thing about this company is that you can basically design your own socks if you order a minimum of 12. Which is like a dream come true for a party planner- Sock Hop? Sleepover Party? Roller Derby? I mean these socks are basically filling a void that I didn’t even know I had! 

Check out their social media pages for more inspo:

https://www.facebook.com/customkneesocks

http://kneehighsocks.tumblr.com/

https://instagram.com/chrissyskneesocks/

Butterfly Baby Shower

This was a baby shower for a friend of mine. She wanted a lavender butterfly theme. It was small and there wasn’t a ton of room so I didn’t want to bring the whole backdrop set up like I often do. I set it up in front of the pretty window and used 3 balloons for the backdrop instead. Keeping with the theme, balloons fly just like butterflies do. It was very pretty in person but not so great for pictures. I bought fresh flowers too because butterflies love flowers. The printout in the frame matched the invitations and had the new baby’s name on it. And I cut out little purple butterflies that I stuck randomly to things on the table to tie together the theme. I wanted a really clean look so I did a runner instead of a banner. 


Thanks for reading! Have a great weekend!!

sig

Party in a Box 


This is just a fun little project I did recently for a friend of mine. It’s literally a party in a box! I thought it would be a fun way to send her a gift card for her birthday. I just used a gift card box from Target and filled it with candles (Dollar Tree), birthday cake gum (Target), pink confetti (Hobby Lobby), and a balloon (Dollar Tree)  attached with washi tape (Target). Then just add the gift card and mail! She loved it!! I actually made a mini birthday banner to add to it before I sent it but I forgot to take a picture. 

If you use a bigger box you could put little gifts in it too! Like nail polish and lipgloss would be cute. Even a birthday hat and blower would be fun. 

I’ve had to plan 4 parties this month so I’ve been using every spare second to do that but I’m almost caught up! I’ll post those pics and some new posts soon. We’ve also been house hunting a little which has been so exciting! 

Thanks for stopping by!

sig